

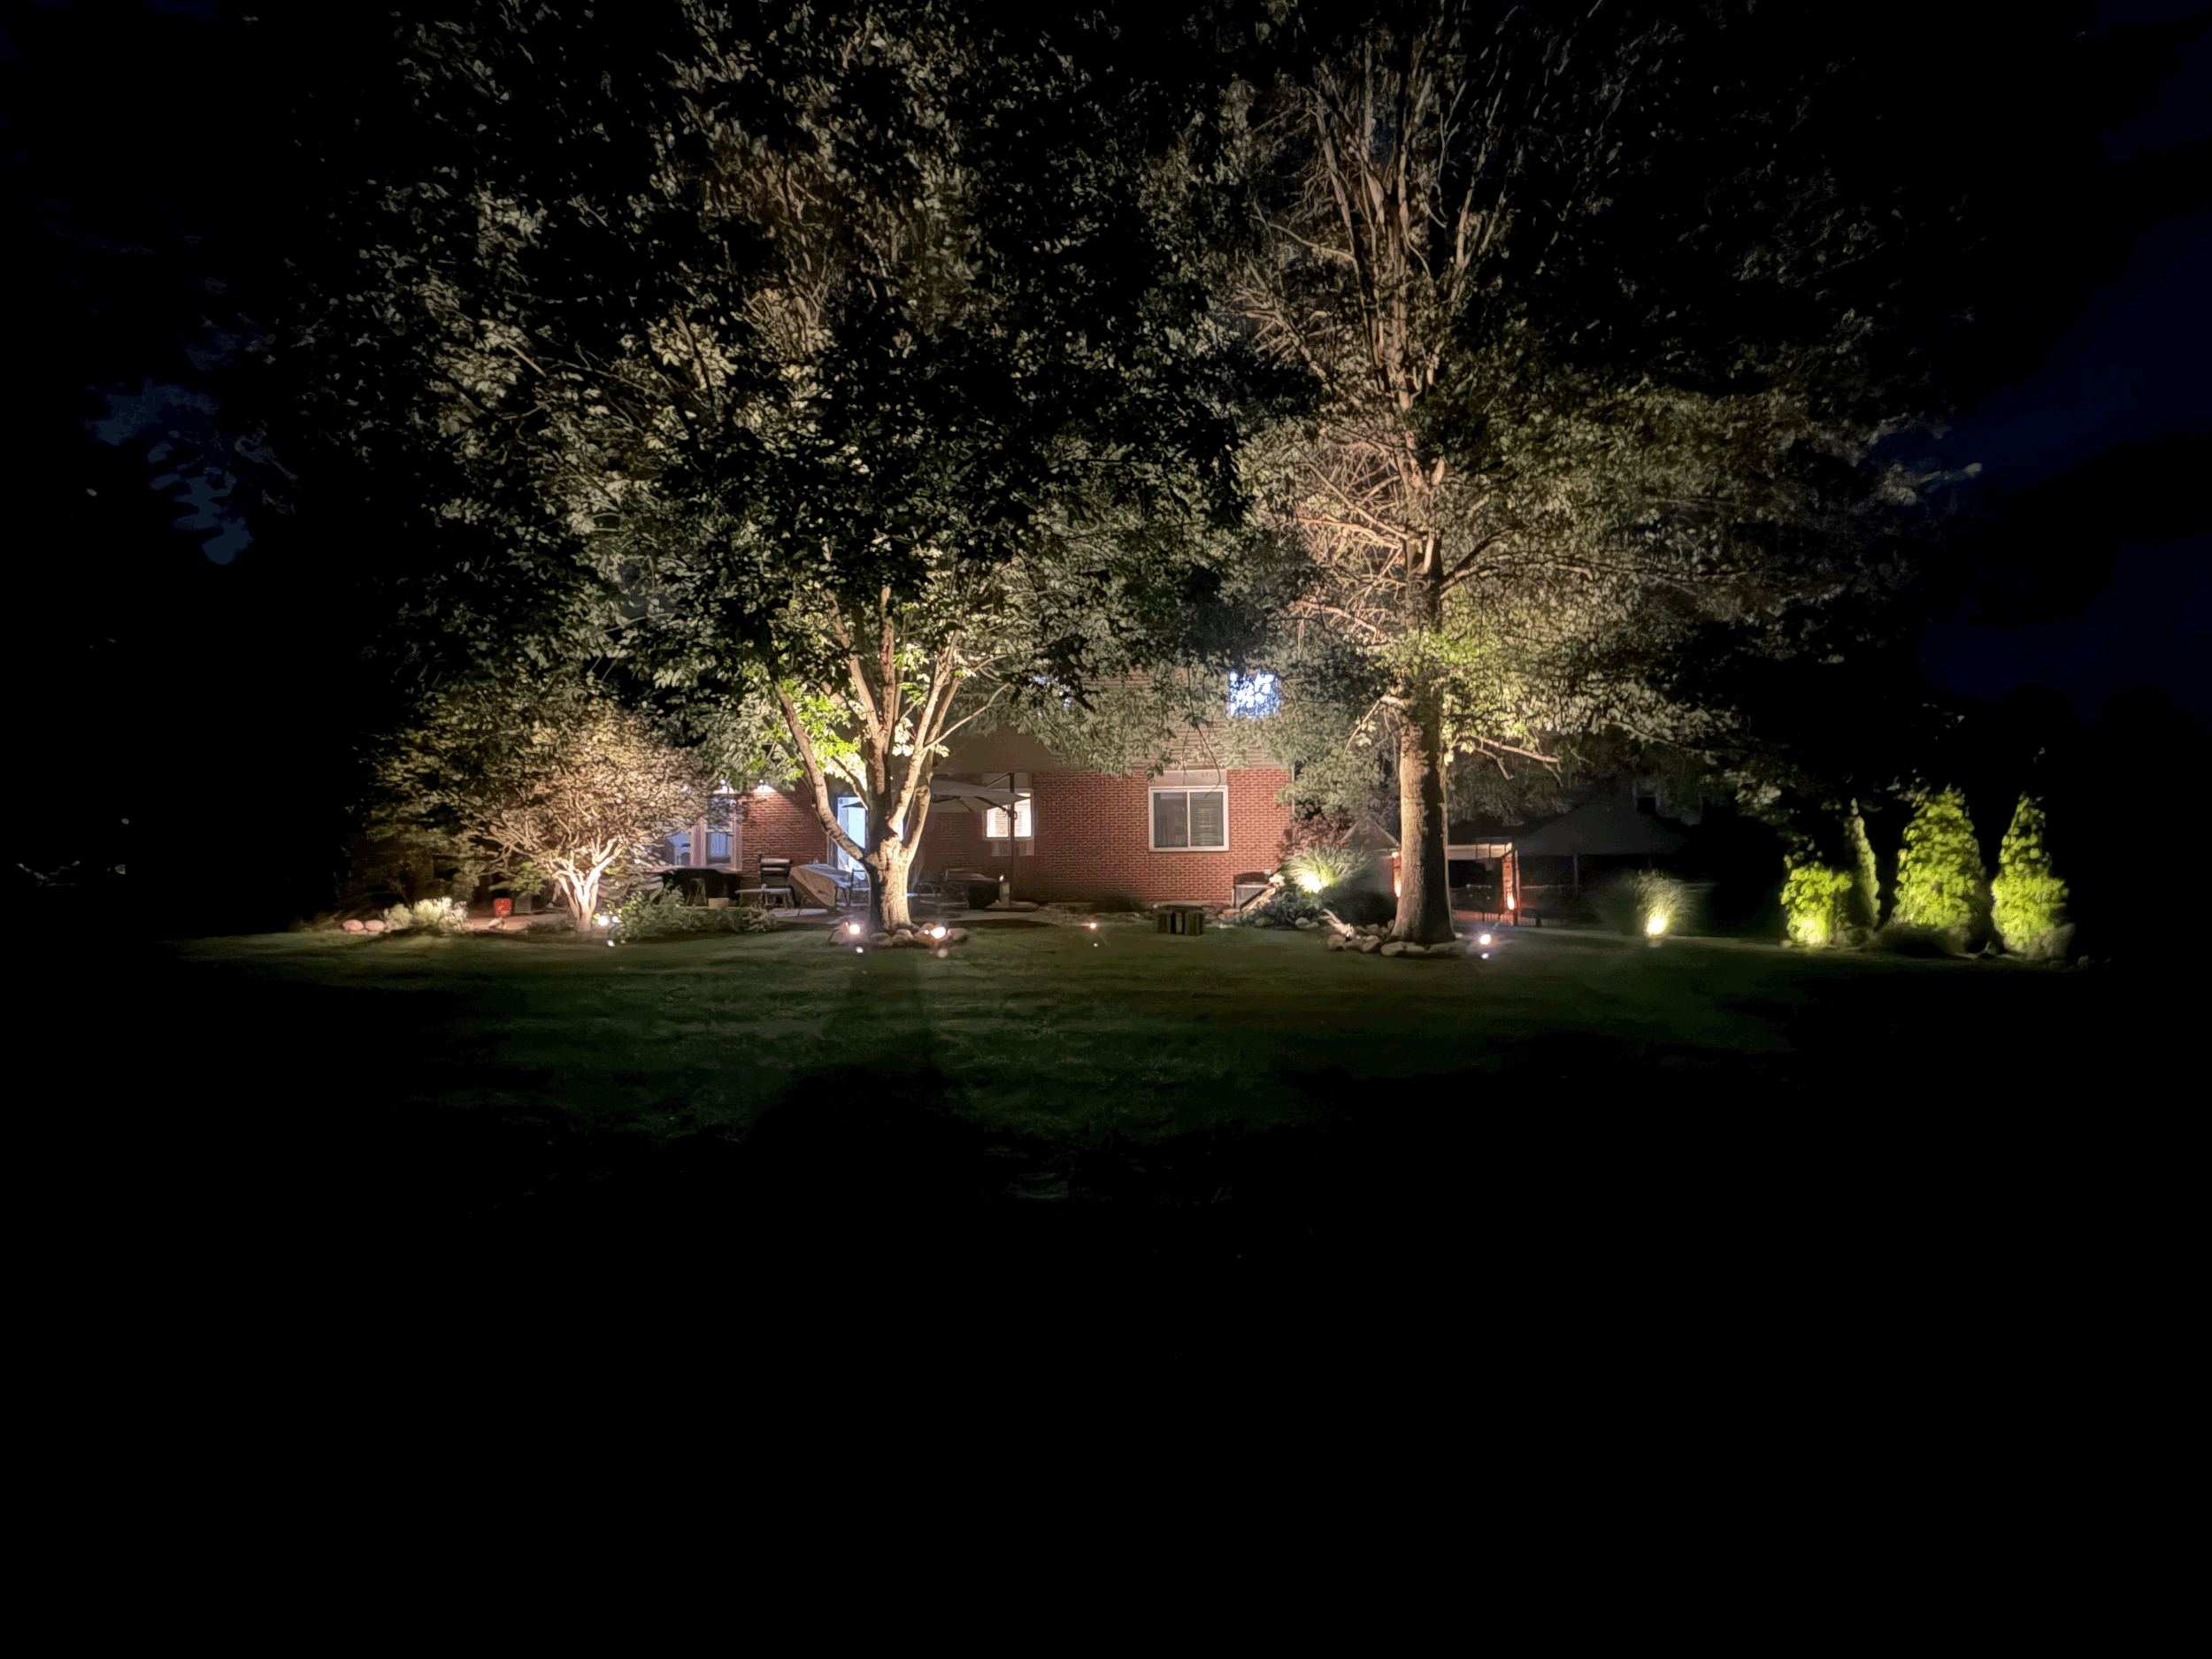
How Ambient Landscape Lighting Can Help Protect Your Home After Dark
A beautifully illuminated property does more than create curb appeal. Thoughtfully designed ambient landscape lighting can make your home feel more secure at night by improving visibility around the areas where privacy, shadows, and poor sightlines can create opportunity.
For Cincinnati homeowners, outdoor lighting should not be treated as a replacement for locks, alarms, or professional security measures. It is, however, a meaningful layer in a complete home-security plan—one that helps eliminate dark approaches, makes exterior activity easier to notice, and supports the effectiveness of security cameras.
Research on improved outdoor lighting in public spaces has found an association with lower crime, particularly property crime, although lighting works best as part of a broader approach rather than as a standalone guarantee.
Visibility Changes the Environment
A dark exterior gives someone more places to approach unnoticed. A well-designed lighting plan helps define the property and brings useful visibility to the areas homeowners rely on most after sunset:
• Front walks, driveways, and entry doors
• Side yards and gates
• Rear patios, decks, and pool areas
• Detached garages, sheds, and service entrances
• Pathways between the home and the street
The goal is not to flood a property with harsh, blinding light. Quality ambient lighting uses carefully placed fixtures to create consistent, comfortable illumination while preserving the architecture, landscaping, and character of the home.
When entry points and travel paths are easier to see, residents, guests, neighbors, and cameras can better recognize movement around the property. Improved visibility and a perceived greater risk of detection are among the commonly cited ways lighting may contribute to deterrence.
Security Without Sacrificing Style
Security lighting does not have to make a home look commercial. At Dishion Lighting, we design architectural night lighting that creates a refined, welcoming atmosphere while supporting better exterior awareness.
Instead of relying only on a bright motion floodlight, a layered plan can include subtle path lighting, tree uplighting, façade lighting, step lighting, and strategic illumination near doors and gates. This approach reduces abrupt dark zones and gives the property a composed, intentional look after dark.
Smart controls can also make the system more useful: homeowners can schedule lighting around sunset, adjust zones for different areas of the property, and maintain a consistent nighttime presence whether they are home or away.
Ring Cameras and Security Systems
Dishion Lighting also installs and configures Ring security systems and cameras to help homeowners connect lighting, visibility, and real-time monitoring.
A professionally planned Ring setup may include:
• Ring video doorbells for front-entry awareness
• Exterior security cameras for driveways, gates, side yards, and rear patios
• Ring Alarm components for doors, windows, and interior protection
• Smart lighting and connected devices designed around how the property is used
• Mobile-app setup, device placement, and homeowner orientation
Cameras are more useful when they have a clear view of the areas they are intended to monitor. Ambient lighting can help avoid scenes that are heavily shadowed or unevenly lit, while Ring cameras add notifications, recorded video options, and a way to check activity from a compatible mobile device.
A Layered Approach to Home Protection
The strongest exterior-security strategy combines several layers: quality locks, reliable doors and gates, visible address numbers, appropriate lighting, cameras, alarm components, and good routines. No lighting or camera system can promise to prevent crime, but a professionally designed system can make the home easier to navigate, observe, and monitor after dark.
Dishion Lighting brings together luxury landscape lighting and professionally installed Ring security solutions for Cincinnati-area homeowners who want their property to look exceptional—and feel more prepared—at night. Contact us to discuss a custom lighting and security plan for your home.

Common Lawn Sprinkler System Problems and How to Fix Them
Learn how to identify and fix common lawn sprinkler problems, including broken heads, leaks, clogs, low pressure, valve issues, and controller failures in Cincinnati.
An Ohio homeowner’s guide to broken sprinkler heads, clogs, leaks, low water pressure, valve and controller problems, and knowing when to call a professional.
A dependable lawn sprinkler system helps protect your grass, landscape beds, trees, and overall curb appeal. But even a well-installed irrigation system can develop problems over time—especially after mowing, landscaping work, seasonal weather changes, or normal wear on underground components.
Some sprinkler problems are straightforward enough for a homeowner to investigate and correct. Others can waste water, damage landscaping, or require specialized troubleshooting. Here are some of the most common lawn sprinkler system problems and practical ways to address them.
Broken Sprinkler Heads
A broken sprinkler head is one of the most common irrigation issues. It may have been hit by a mower, stepped on, damaged by a vehicle, or shifted as soil settled around it.
Common signs include:
• Water spraying straight up, sideways, or onto pavement
• A sprinkler head that does not pop up fully
• A head that sits too high, too low, or at an angle
• Pooling water around one sprinkler location
• A zone that has noticeably weak coverage
First, run that irrigation zone and watch the affected head. Turn off the water, clear away dirt and grass, and inspect the head for cracks, a damaged nozzle, or a broken riser. If the head is damaged, replace it with a compatible model and set it at the proper height—typically level with the surrounding soil or turf.
If multiple heads are damaged or coverage patterns no longer match, it may be time to have the zone professionally adjusted.
Clogged Nozzles and Uneven Spray
A sprinkler head that is operating but producing a weak, irregular, or partial spray pattern may have a clogged nozzle or filter. Dirt, sand, small stones, grass clippings, and mineral buildup can interfere with water flow.
To check for a clog:
• Turn off the zone and remove the nozzle carefully
• Rinse the nozzle and filter with clean water
• Use a soft brush or small plastic pick to remove debris
• Avoid enlarging the nozzle opening with a metal object
• Reinstall the nozzle, then run the zone to test the spray pattern
A clean nozzle should distribute water evenly across its intended area. If the pattern remains poor after cleaning, replace the nozzle or inspect the head and lateral line for a deeper restriction.
Uneven coverage can leave dry brown spots in the lawn while oversaturating other areas. Correcting spray patterns early can help protect your turf and reduce water waste.
Leaks in the Irrigation System
An irrigation leak can range from a loose fitting near a sprinkler head to a cracked underground pipe. Small leaks often become more serious over time, particularly if they erode soil or cause a sprinkler head to sink.
Look for these warning signs:
• Wet, muddy, or unusually green spots in the lawn
• Water pooling near sprinkler heads or valve boxes
• A drop in pressure across one zone
• Water running after the controller has shut the system off
• An unexpectedly high water bill
A leak at a sprinkler head or fitting may be visible once you carefully expose the area around it. Turn off the water before attempting repairs, and make sure all fittings are secure and undamaged.
However, a leak in a buried pipe, manifold, or valve connection can be difficult to locate without causing unnecessary damage to the lawn. If water continues to surface, pressure drops suddenly, or you suspect an underground break, professional diagnosis is usually the better choice.
Low Water Pressure
Low pressure can prevent sprinkler heads from popping up fully and cause poor coverage throughout a zone. Instead of a consistent spray, you may see weak streams, short throw distances, or heads that barely move.
Potential causes include:
• A partially closed shutoff valve
• A clogged filter or nozzle
• Too many heads operating on one zone
• A damaged or leaking pipe
• A malfunctioning zone valve
• A pressure-regulator issue
• A water-supply problem
Start with the simplest checks. Confirm that the irrigation shutoff valve is fully open, then inspect and clean affected nozzles. Compare the problem zone with other zones—if only one zone has low pressure, the issue is more likely within that zone’s valve, piping, or sprinkler heads.
If the entire irrigation system has weak pressure, the problem may relate to the main water supply, backflow device, or system design. Avoid increasing runtime to compensate for low pressure; that often leads to runoff and still does not produce even watering.
Valve Problems
Irrigation valves control the flow of water to individual zones. When a valve fails, a zone may not turn on, may run weakly, or may continue running after the controller shuts it off.
Common valve symptoms include:
• One zone will not activate
• A zone turns on manually but not from the controller
• Water continues flowing after the scheduled cycle ends
• The valve makes a loud humming or buzzing sound
• Water leaks inside or around the valve box
Check the valve box for standing water, damaged wiring, loose connections, or obvious cracks. You can also try manually opening the valve to see whether water reaches the zone.
Valve troubleshooting can involve electrical testing, solenoid replacement, diaphragm repair, wiring repair, or valve replacement. If you are unsure which valve serves the affected zone—or if a valve is leaking underground—it is usually best to bring in an irrigation professional.
Controller and Timer Issues
Sometimes the sprinkler system itself is working properly, but the controller is not sending the correct signal. Power outages, seasonal changes, dead backup batteries, programming errors, and damaged wiring can all affect a sprinkler controller.
Before assuming a major repair is needed, check:
• The controller has power and the display is active
• The date and time are correct
• The correct watering days and start times are programmed
• Seasonal adjustment settings have not reduced runtime too far
• Rain-delay mode is not activated
• The backup battery, if applicable, is still working
• The controller is set to automatic operation
It is also important to avoid setting several start times when you only intend to extend the watering duration. Multiple start times can make the system repeat the entire cycle, causing overwatering and higher water use.
Smart irrigation controls can make scheduling easier by allowing convenient adjustments and, depending on the model, weather-aware watering features. For homeowners considering outdoor automation, explore smart outdoor controls and upgrades that complement a well-maintained landscape.
DIY Repair or Professional Help?
Many homeowners can handle basic sprinkler maintenance, such as cleaning nozzles, adjusting spray direction, replacing an accessible broken sprinkler head, or correcting controller settings.
A professional repair is generally the safer option when you have:
• A suspected underground leak or broken pipe
• A valve that will not close or activate
• Electrical or controller wiring issues
• Repeated low-pressure problems
• Multiple failing zones
• Significant lawn flooding or erosion
• Backflow-prevention concerns
• A system that needs redesign, seasonal service, or broader coverage adjustments
A good rule of thumb: if the issue is visible, isolated, and accessible, it may be a reasonable DIY repair. If it involves buried piping, electrical troubleshooting, water supply pressure, or multiple zones, professional diagnosis can prevent a small issue from becoming a larger repair.
Protect Your Lawn and Landscape
Regular inspection is one of the best ways to keep irrigation issues manageable. Run each zone periodically, walk the property while it is operating, and watch for misdirected spray, dry spots, leaks, or heads that do not pop up correctly.
Routine irrigation care pairs well with professional outdoor system maintenance for the rest of your property. A properly watered lawn and landscape also help showcase the outdoor spaces you have invested in—from planting beds and walkways to architectural and landscape lighting.
If you are planning upgrades to your outdoor space or would like to discuss lighting, smart controls, or related exterior improvements, contact Dishion Lighting to discuss your project.

DIY lights?
If you’ve ever installed a DIY landscape lighting kit from a big-box store, you know the cycle: it looks great for a season, then output fades, fixtures tilt, and half the lights stop working after rough weather. You end up re-buying the same kit and repeating the same frustration.
Professional landscape lighting is built to break that cycle. Instead of temporary, low-output fixtures, you get a permanent low-voltage system designed around your property’s safety needs, architecture, and nighttime visibility goals.
Materials and Build Quality
Big-box fixtures are typically mass-produced from cheaper materials—plastic painted to look like metal, or low-grade soft aluminum. These fixtures are more likely to crack from minor impacts like lawn equipment, trimming bushes, or washing the house.
Professional fixtures use higher-quality materials such as brass, copper, or high-grade aluminum and zinc alloys. These materials resist corrosion, handle seasonal temperature swings, and withstand physical impacts far better than consumer-grade options. Commercial-grade aluminum fixtures typically last 15–20 years, compared to 5–8 years for plastic or stamped-metal alternatives.
Longevity and Performance
Professional LED fixtures are engineered for long-term outdoor conditions. Today’s professional LEDs can last 10 to 15 years before needing replacement, with simple annual maintenance keeping them in top shape.
In contrast, big-box fixtures often have integrated bulbs that can’t be replaced. Once the light source dies, the entire fixture must be replaced, adding up quickly in cost and hassle. Professional systems often allow for bulb replacement and offer different brightness and beam options to suit the design.
Warranty and Ownership Experience
One of the biggest differences is warranty coverage. Many professional landscape lighting brands offer lifetime warranties on brass, copper, and stainless steel fixtures, as well as on transformer cores and housings.
Big-box stores may offer warranties too, but fulfilling them can be tedious, stressful, and lengthy. With professional systems, you get straightforward, no-nonsense coverage that protects your investment for the long term.
The Bottom Line
Big-box landscape lighting is a temporary patch. Professional low-voltage lighting is a permanent property upgrade. If your goal is reliable safety, consistent nighttime curb appeal, and fewer recurring headaches, the professional system wins—backed by superior materials, longevity, and lifetime warranties.
Ready to upgrade your outdoor lighting? Contact Dishion Lighting today for a custom, professional landscape lighting system designed to last a lifetime.
If you’ve ever installed a DIY landscape lighting kit from a big-box store, you know the cycle: it looks great for a season, then output fades, fixtures tilt, and half the lights stop working after rough weather. You end up re-buying the same kit and repeating the same frustration.
Professional landscape lighting is built to break that cycle. Instead of temporary, low-output fixtures, you get a permanent low-voltage system designed around your property’s safety needs, architecture, and nighttime visibility goals.
Materials and Build Quality
Big-box fixtures are typically mass-produced from cheaper materials—plastic painted to look like metal, or low-grade soft aluminum. These fixtures are more likely to crack from minor impacts like lawn equipment, trimming bushes, or washing the house.
Professional fixtures use higher-quality materials such as brass, copper, or high-grade aluminum and zinc alloys. These materials resist corrosion, handle seasonal temperature swings, and withstand physical impacts far better than consumer-grade options. Commercial-grade aluminum fixtures typically last 15–20 years, compared to 5–8 years for plastic or stamped-metal alternatives.
Longevity and Performance
Professional LED fixtures are engineered for long-term outdoor conditions. Today’s professional LEDs can last 10 to 15 years before needing replacement, with simple annual maintenance keeping them in top shape.
In contrast, big-box fixtures often have integrated bulbs that can’t be replaced. Once the light source dies, the entire fixture must be replaced, adding up quickly in cost and hassle. Professional systems often allow for bulb replacement and offer different brightness and beam options to suit the design.
Warranty and Ownership Experience
One of the biggest differences is warranty coverage. Many professional landscape lighting brands offer lifetime warranties on brass, copper, and stainless steel fixtures, as well as on transformer cores and housings.
Big-box stores may offer warranties too, but fulfilling them can be tedious, stressful, and lengthy. With professional systems, you get straightforward, no-nonsense coverage that protects your investment for the long term.
The Bottom Line
Big-box landscape lighting is a temporary patch. Professional low-voltage lighting is a permanent property upgrade. If your goal is reliable safety, consistent nighttime curb appeal, and fewer recurring headaches, the professional system wins—backed by superior materials, longevity, and lifetime warranties.
Ready to upgrade your outdoor lighting? Contact Dishion Lighting today for a custom, professional landscape lighting system designed to last a lifetime.